How to… image formatting
In my previous post I wrote about issues that make images in publications hard to understand. Now let’s improve this!
Before you start…
At best do not mess with the image from your microscope (usually .TIFF).Before adjusting an image for publication, first make a copy and keep the original untouched somewhere save. You more likely than not will need it at some point, e.g. to re-do analysis with newer software, make a better version for publication, or to give to colleagues for reanalysis!
Adjust brighness and orientation
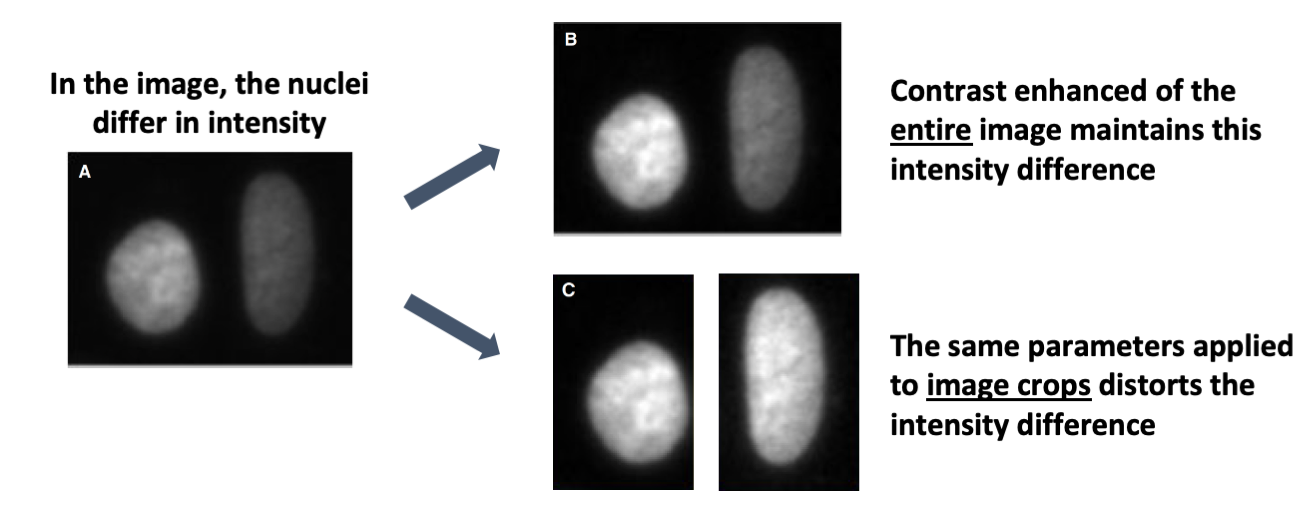
Almost always adjustments are necessary in digital images, most common of the brightness and contrast. When doing quantitative comparisons of images, fixed intensity values should be used and novice users should only apply linear adjustments that are applied to the whole image. Important: make these adjustments before cropping an image! Miura and Norrelykke in detail describe how the same adjustment calculation varies when performed on an full-view versus a cropped image. Next, many images are rotated. There are consensus ways to orient images in many fields. Humans are shown with the head at the top and the feet at the bottom, but also other traditions exist, e.g. for epithelia the apical side in shown at the top etc. This often requires rotation of microscope images. All rotations must be done carefully as this process redistributes image intensity values. In most software, increments of 90 degrees pixels can be reordered rather than interpolated, which maintains the intensity distribution. (Find out more here: Miura & Norrelykke 2021, Schmied & Jambor, 2020).
Cropping & Magnification
Cropping is a normal adjustment to focus the audience on the key message. To show cellular structures, a close up of the organelle is required, not the whole slide that was imaged. As a rule, cropping is permitted, as long as no key feature is removed that is important for the scientific conclusion. Scientist should also consider the size of the image in the final figure: are the features that matter visible? Might it be better to show the image in larger size? Alternatively, consider enlarging and cropping the image to focus the reader on your key result, or ideally show the original image and an image detail (inset) side by side. When insets are shown their position in the original image must be indicated, e.g., with a “Region of interest”.

Assembling a figure with images
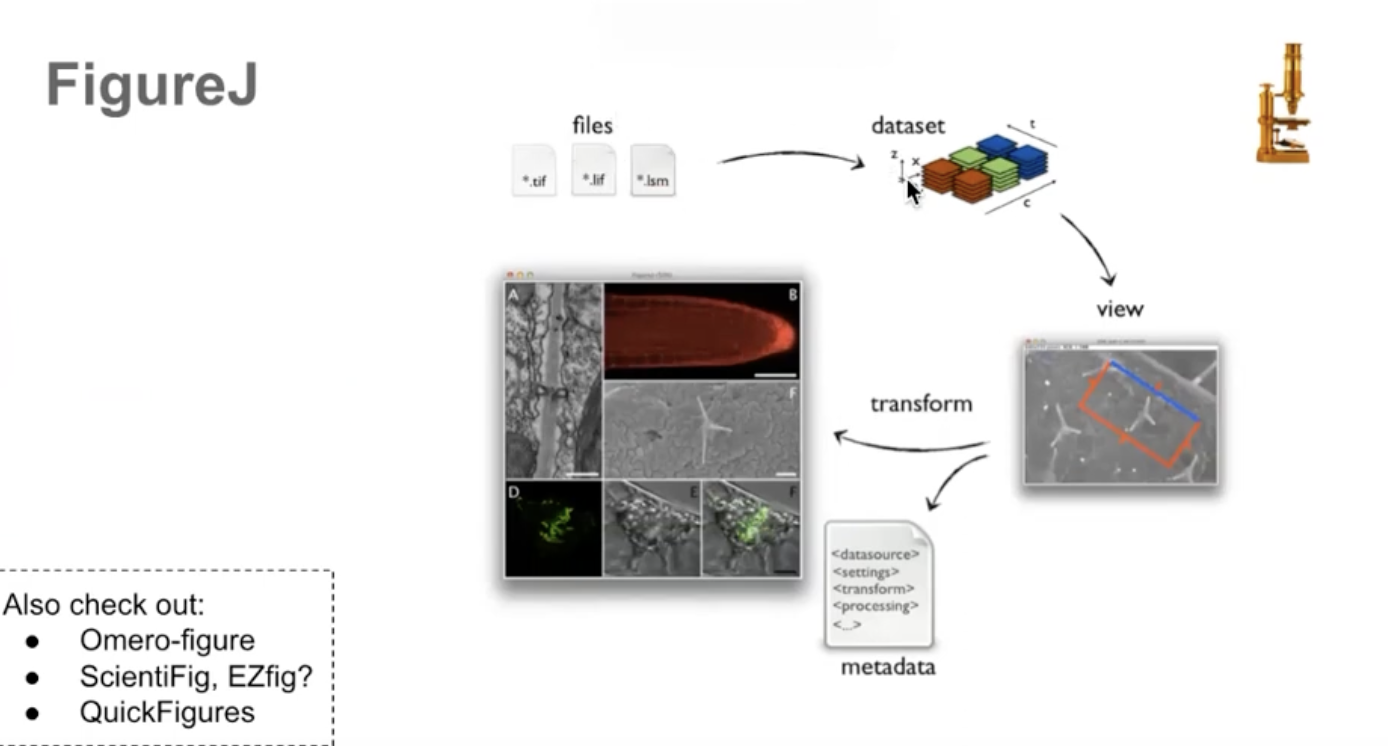
Finally, when images are all processed there are many solutions to assembling multi-panel figures. Usually, figures do not only show one microscope image, but several views, split channels, merged images, or false-color quantifications. One is FigureJ, a plugin for ImageJ/FIJI by Jerome Mutterer. Another possibility is QuickFigures, again for ImageJ by Mazo. And last, it is also possible to run image processing scripts in the vector graphics software Inkscape directly (here is a youtube tutorial by Jerome Mutterer).
Read more
- Reproducible image handling and analysis. Miura, K., Norrelykke, S.F., 2021. EMBO J
- Effective image visualization for publications - a workflow using open access tools and concepts.Schmied, C., Jambor, H.K., 2020. F1000Res 9, 1373.
- QuickFigures: a tool to quickly transform microscope images into quality figures.Mazo, G., 2020. PLoS One